Tuesday, August 27, 2013

What is that funky smell?


You guessed it - time to start the plumbing. Now I knew the pipes were in a bit of a state as all the upstairs plumbing was blocked along with all the drains so I was expecting to replace everything.

Trench the length of the property for pipes
I got an extra guy in to dig up all the channels for the new pipes as I didn’t want to slow down my guys doing the plastering. They have finished in the inside downstairs and have just started to do the outside under the arches. The ceilings are so high it makes me want to cry when I see how much cement I go through a day... but the good news is I am about two thirds done with the walls - I cannot wait to to finish them all.
All the old pipes were blocked solid 
I have dug the trench a bit wider in the back garden as I need to make some concrete foundations for the pillars to sure up the balcony - I thought I may as well do this whilst I am putting the plumbing in. 

There was a lot of rocks!
My original plan was to install a 6 inch pipe down the length the of the property and tie in all the 4 inch wastage pipes from the bathrooms and drains. All looked good on paper... However when I got to digging up the collapsed inspection pit - which is inside the house I might add - I found the old clay pipe that connects the main sewage line under the street outside. Now the good news is that it seems to be all in tact but the bad news is that it is only 4 inches... 
Thats the clay pipe in the right hand corner of the pit
So I have a decision to make before I move on... I have spoken to a few other house owners and a small hotel in the Colonial Zone and apparently that is the norm. To me it seems very small as I will have around 10 bathrooms - it doesn’t seem right to me. My choice is either go to Ayuntamiento (which I really don’t want to do after the permit process) to dig up the road outside my house to connect a 6 inch pipe or just go with the 4 inch and add an extra inspection pit and cleanouts to ensure if it does block I can unclog it with ease.  I haven’t a clue what to do yet to be honest going to have to think about that one. 

Plastering under the sun deck
So plumbing wise I have about 6 more days of digging for the guy to do and in the mean time I am getting quotes for all the pipes and fittings. But I am hoping it goes quite quickly to actually install the plumbing - I have it all planned out so hopefully I shouldn’t run in to to many problems. 

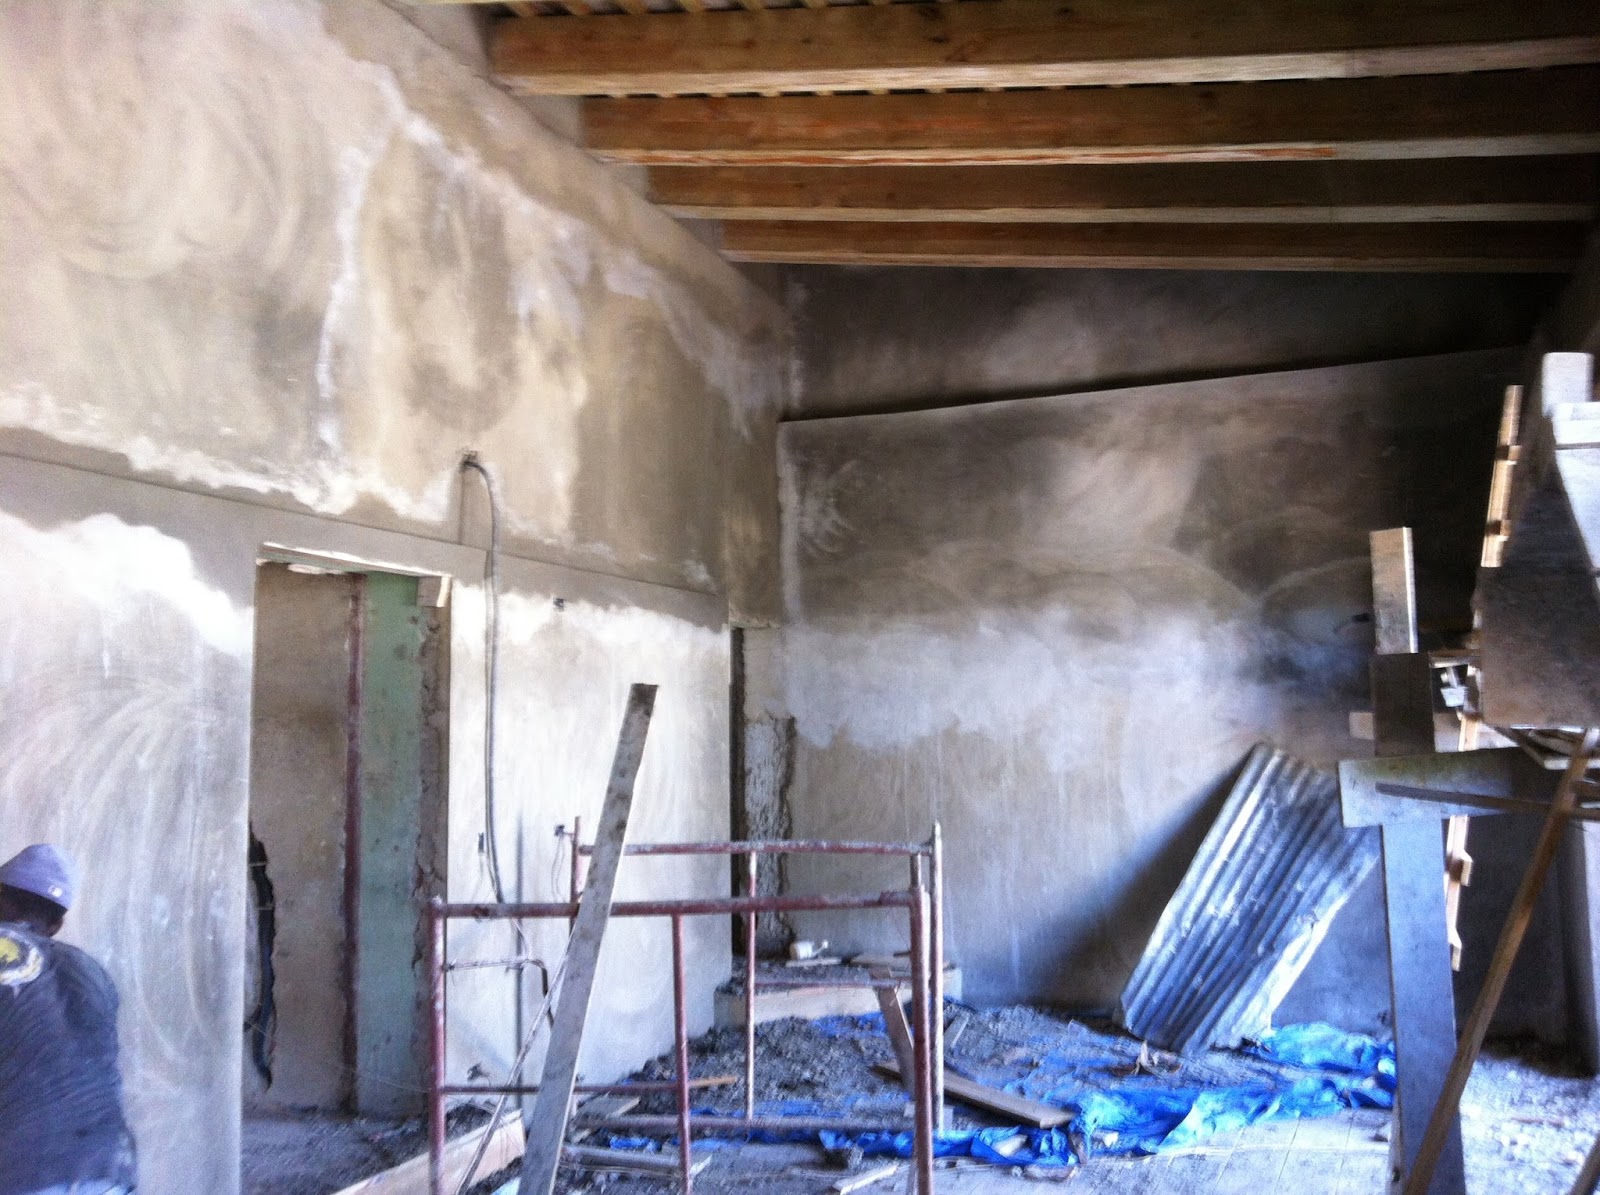
Plastering is moving along well
I am eventually getting through my job list - every now and then something pops up however... like yesterday I forgot to run the wire to the grounding rod so I was rushing to get it installed before the guys plaster that wall. Also I have been meaning to fix a few things on my car and service my bike - so this week I replaced my starter motor, two window motors and front brakes on my Jeep and replaced the front and rear brake pads on my bike along with changing the oil. Its little things like that I have been meaning to do for a while now but you know its time when you have to carry a hammer to start the Jeep and you hear scraping whilst you brake on your bike. 
Fixing my bike around the mess
So hopefully by the next post I will have most of the waste pipes fitted in the house and the guys should almost be finished the plastering out the back. Until next time...


Sunday, August 18, 2013

Light at the end of the tunnel...

I am really starting to see the light at the end of the tunnel now. It may not look it from the photos but I have had a really productive couple of weeks. Where shall I start...

Upstairs rear of house
Well I have finally finished running all the electrical wiring over the whole house - the amount of wire I used was a bit of a shock but it is done now and I have to say I did not enjoy doing it that much. Having to dig in the walls was tired and dirty work - a lot of people said to me why dont I just run wires outside on the walls but I hate the look of houses with external wiring and while I was doing the walls anyway it seemed stupid not to run them in the walls.

A big job!
I am sure I have made a few mistakes in there somewhere but I will find them when I start testing the circuits. I have used a 200amp main panel, a 125amp sub panel for upstairs and to 40 amp junction boxes at either end in the garden. I forget the size of the place sometimes as I have had to buy and install over 300 wall outlets/switch boxes. I did go a little crazy putting outlets everywhere but it is better to have to many than to little... right?

Makeshift Scaffolding 
The guys have been working really hard with the walls - I can tell they are fed up with it - it makes it worse have to bring all the materials upstairs so hopefully it will be easier downstairs. They have done a really good job upstairs and have just finished it today, well I say finished... I haven’t completed the plumbing yet so I have 4 bathrooms and a kitchen left to plaster up there but its 80% completed.

Starting downstairs
The amount of windows, doors and details in each room is really time consuming and it gets frustrating at times with the apparent lack of progress - but when that happens I just look back at my last blog post and see the progress since my last post and the frustration goes away.

My big goal over the next month is to actually move in - might seem like a crazy thought looking at the photos but once the walls and plumbing are complete downstairs its doors, floors and decorate and our home is ready. It will save me a fortune in gas and time going back and forward each day as gas seems to be going up in price everyday here at the moment.

Just finishing the windows
One of the jobs that has popped up is the rear balcony - I kind of put it to the back of my mind and though I would just deal with it at the end but it became apparent that I need to do something with it before they plaster downstairs. It looks in a bad state but the supports are safe, although they are not level. They are made from concrete with metal bar so are really strong but I want to build a little roof overhanging the balcony - although it will not be heavy I am unsure about adding any extra weight to it.

So the plan is to use the old roof beams as pillars to hold and level the balcony and continue those pillars up to the overhang roof. I was a little unsure about how this would look at first but I liked the look of the pillars supporting the roof on the pool house so I thought why not give it a go.

Looking good
The other option is to build concrete pillars to hold it all up but I like the idea of using the old roof beams as look awesome and best of all they are free! Being as the base of the pillars is where the plumbing will be run I will start digging it up and putting up the pillars at the same time.

Beach house in Azua
I am working 6 days a week, around 10 hours a day at the moment - I am not complaining as I love it but it sure does get you tired. I try and get away every Sunday to do something different - this weekend it was a friends beach house in Azua - just thought I would add this photo in as I had a great day off.

So whilst the guys have the plastering downstairs to keep them busy for at least another month I can move on to my next task. The plumbing! I am really looking forward to it as I got so bored of running wires.

Monday, August 5, 2013


Wow, time is flying - I cannot believe it is August already. I am a little behind my planned schedule but still reasonably happy with the progress so far. The walls have turned out to be a bigger task than thought and even more of an expense than planned. You would not believe the amount of cement I have gone through...
An almost complete pool house
Although when you look back at what the walls were like before you can tell why it needed so much - I dont think one wall is straight in the whole house.
Finished walls - what a difference
The guys have started on the outside upstairs now which will be a massive transformation - I cannot wait for it to be completed. Whilst the guys are doing the walls I have been finishing running the electric downstairs, I have finished the back part of the house and the outside lighting now I need to do the four big main rooms. Its one hell of a job but I am getting there.
The huge doorways take a lot of time
I have just bought the main panel so have started to dig in to the wall to fit that into place. As soon as I finish the electrics I am going to have to start the plumbing. Thats the problem with being on a tight budget - I have a list a mile long and it keeps on getting bigger!. 
The outside walls - had seen better days
The pool house at the back of the property was annoying me as the roof was leaking and was half finished so I decided to task myself with finishing that. First was the roof, the tiles put up by a previous worker had to come off as it was leaking and I put a proper roof with waterproof membrane and replaced the tiles on top.
Cant wait to get painting
It was a bit of a pain as I had to buy a few more roof tiles as I broke about 15 when taking them off but I was pleased with the finished roof. I also finished hanging the doors, and varnishing all the wood - a very messy job but I thought I should do it sooner rather than later to protect the wood. I also put another beam I recycled from the old roof as a support - I think it looks pretty good actually.
Rear balcony
The doors were a priority of mine as now I have a secure lockable room for all my tools which is a big weight off my mind. I know I have Enzo to guard the place and the workers but it just makes me sleep easy knowing they are secure.
Remember this picture - should be a big transformation in a few weeks
So hopefully by the next post the upstairs plastering will almost be complete... until next time.

Wednesday, July 24, 2013

Walls, walls, walls...


I have been waiting for this time for a while... the Roof is 100% finished! All sealed and is water tight - it has been tested with a few big rain showers and no leaks!
Back part of the roof ready for sealing
It looks pretty cool I think, it makes me happy as no more roof work as now I can turn my attention to the second floor walls. Those are holes for the skylights you can see if you were wondering.
100% finished roof
Im not sure if I mentioned in my last post but I have been installing all the electrical wiring which is probably my least favorite job and I have the cuts on my hands to prove it.
Wherever I am - Enzo is watching
Upstairs is all wired and I have also installed the sub panel so all that is needed is to connect up all the wires to the breakers and install all the outlets - but this can be done when the walls are complete.
The start of the walls
Talking of the walls I had the guys make a start upstairs. I decided to start the second floor first even though I want to move in as soon as I can - it would have made sense to start on our living area first as we will be living downstairs but I have so many deliveries of materials that come through the main doors I decided to finish upstairs first.
Health and Safety?
One of my tasks that I set myself last week was to clean up the place - it started to get to the point where I was having to climb over stuff just to get in to rooms. Enough was enough! About three van loads of trash later the place was clean and organized.
What a mess
So back to the walls... I had the guys start on the front room first which had the worst condition walls of the whole house and was also the biggest room. I figured it would all be downhill from there. 
Looks like a disaster zone - something had to be done
The plastering should be done with a cement and fine sand mix with lime - the old colonial walls need to be able to breath hence why you see a lot of cracks and plaster falling off the houses here.
It took a day and half but the garden is cleaned up
Now it takes a long time to make the lime mix plaster as it is recommended that you get it made up to 6 months before you need it as it needs to sit - I m not sure why but thats the way it is.
Remember this picture in a couple of weeks
Even though I have just said all that I chose not to use the lime mix. I had a few reasons ... the main being that about 20 years ago someone had started to renovate the house (and never finished) and reinforced all the walls with about half a foot of concrete and steel bar inside. So it would have been pointless.
The high walls are really time consuming
For it to be worthwhile using the plaster with lime would mean having to take all that metal bar and concrete off the walls. That would have been a huge job taking a lot of time and money - also there was a chance to damaging the original colonial walls as pulling off all the concrete and bar would be a difficult job. It may not have looked neat but the concrete they put on the walls was solid so it didn’t make sense taking it off hence the decision to use normal plaster or panete as they call it here.
The walls were different levels hence the steps - easiest way to sort it
It has taken over a week to finish the big room but they did it - it still needs tidying up but  now all that is left in that room is to put on all the outlets/lights and to add the doors and the room will be ready for decorating.
The front doorways and windows
I have decided to plaster all the rooms apart from the bathrooms as I still haven’t started the plumbing yet but that will be started as soon as I finish the downstairs electrics.
Almost ready to paint... almost
The job I have started to think about was the doors... now this has the potential to be a massive cost. I have worked out I need about 40 doors and 20 windows - yikes. So I am  trying to find out the best way to do this (and a cheap way).
The final part
I bought a couple of budget doors just to test out the quality to put on the pool house. They are pine and need finishing but I have almost hung one - I am am undecided. I suppose I will make a decision when its varnished. This is the cheapest way to go but I might go for the wood look aluminum doors as they are less maintenance and stronger - not very colonial I know but they actually look pretty good - although the cost is prohibitive.
The jury is still out on that door - maybe it will look better when varnished
I will custom make the front doors for the house I want these to be good quality, heavy doors to match in with the colonial zone. Busy times ahead!

Tuesday, July 16, 2013

Starting to get excited...


Oops its been a couple of weeks since my last post and I have to say I am pleased with the progress. It has been a up and down two weeks though - where do I start?
Finishing the roof
Well in my last post I was in the middle of doing the floor and was trying to finish replacing a back part of the roof. Well I will start with the roof... the bad part was I decided to replace the whole back roof aswell as when I was roughing in the electric lines I notice that the 4ft thick walls were wet all the way through... the water was just sitting on the roof and filtering down the walls. I really didnt want to have to do it as my budget is stretched as it is but it needed to be done.
Rear Roof
The guys have been working hard on the roof and they have almost finished it. There was holes left in the roof for skylights so I decided to keep them and they will be skylights over the showers. Now the roof all runs the same way so all the water runs down in to a pipe rather than straight of the side of the roof. 
What a mess
I do not know if you heard but Tropical Storm Chantel passed by and although it wasnt that bad it did bring a lot more rain! I have been waiting to seal the main roof that I finished last month but due to the rain it made it impossible. However just a day after the storm we had a few days of sun and I took the opportunity to seal it. I was getting fed up of having leaks inside so it had to be done and I have to say it looks pretty awesome. I have one more coat to go but it has done the job - I now have a watertight property!
Sealing the roof
So the back part of the roof is coming along well, a couple more days and that will be finished also, it will be a happy day as that will be the end of all the roof work.
First coat complete
The next job was to finish the floor, I mentioned in my last post that I did two layers of boards of the beams to keep the noise down from downstairs. It was a bit tricky at times as I used wooden boards, not pre made floor boards. The problem was that even though they are meant to be cut to the same size and thickness they are not all the same so it was a bit like a jigsaw. 
A completed floor
But thankfully I finished with just a little wood left over and I have to say I am pretty happy with the result! It still needs to be sanded, filled and varnished but it is going to look really good. Again very happy as thats more heavy work out of the way.
Just need to sand and varnish
I had started the electrics in my last post and I am two rooms away from finishing the upstairs - this is without a doubt my worst job... digging in to the walls to run the lines and cutting all the wire is tedious work - but upstairs is almost complete.
Tropical Storm Chantel pays a visit
So as soon as the guys finish off that part of the roof then they have about three weeks worth of plastering upstairs. They have already started on the big front room as it was raining one day and I cant wait for it to be completed.
Starting to plaster the walls
I haven’t installed the plumbing upstairs yet as that would involve digging up down stairs and I want to get upstairs as close to finished as possible before I start the plumbing. I will not recognize the place when the walls are done, it really is coming together and as soon as the plastering is done I can start getting the door and windows put in.

So thats all for this post, it will be an exciting few weeks with a big transformation!

Wednesday, July 3, 2013

Week 8 - The rain has to stop at some point... right?


Ok this is starting to drive me crazy... when will the rain stop? This is actually the first June I have spent in the country as I am usually in the states for a few month each year and I do not like it!
All I need is a week of sun to dry out the roof so I can seal it. Obviously thats to much to ask even though we are in the Caribbean. The new roof is holding up well though its just around the edges that I have some filtration but the sealant will stop all that when it is applied.
Beams all up!
So the rain has thrown a spanner in the works for a few of the jobs I had planned last week but not to worry, I had the guys start roughing in the electrics. Basically I spray painted where I want to outlets to be and they have dug in to the walls, its a dusty and horrible job but it needs to be done.
View from the ground floor
Last week I said that I had hoped to get the floor completed and I am almost there, just a few of the edges and over the stairs that need to be covered over. Getting the beams all aligned was a tough job as I have 13 on each side of the main house, I had to use the hydraulic jack from my car to raise them from underneath then the guys would set them in place.
Upstairs common room
One of the problems I had was there was a big concrete beam at head height when you walked up the stairs... not a great location. It was not a supporting beam so I took that out which was not an easy job. 
The floor boards went up pretty fast actually and it is such a good feeling to be able to walk on the floor when just 4 weeks ago I had bare walls with no roof or floor. I still have the second layer to go on but that should not take long at all.
Soon to be completed bedrooms
Some of the other little jobs I have been working on was the back pool house - I added a concrete step and used one the old Caoba beams from the roof as a pillar to support the roof that was put on.
Recycling the old floor beams
We have also put the frame up for the little roof section on the back part of the house, which wont take long either. The hardest decision is to decide where all the rain water will run. My garden is on a slope and at the moment the water just pours into the house... not ideal. So I will install a waste pipe going from the roof out on to the street. It is a big run but has to be done. Although I have decided to leave the plumbing as one of my last jobs. I will concentrate on the electrics at present. 
Small section of the rear roof being replaced
In order to save money due to my very tight budget I have decided to put in the electrics. I know a lot of people will say thats not wise but I have all the plans so know the size of the wires and I will get a qualified electrician in to join it all up at the main service panel and test it all. There is a lot of work ahead to get the electrics in but I am hoping to have the upstairs completed in the next week or so.
Roughing in the electrics

So until next week.